Stirrup Recoveries (Assisted)
I never heard of stirrup (sometimes called a sling) recoveries until I met a guide from the Pacific Northwest. Once I saw the basic concept it made a lot of sense to me. The stirrup steals it's name from the stirrup used on a horseback riding saddle. It is a device that gives the kayaker in the water a place to put his or her foot so they can step up to get back into their kayak.
For those who lack the upper body strength, have lost strength due to exposure, have an upper body injury or just have difficulty performing the normal re-entry techniques a stirrup may provide the assistance you need. The stirrup methods are really aids to the existing recovery techniques. They technically should be classified as re-entry methods. However, I hear them more commonly referred to as stirrup recoveries. Regardless of the term you use the idea is to use the strength of your lower body to get you up and out of the water and back into your kayak.
Stirrups are made from a variety of materials, have different lengths and have different features accompanying them. Ultimately they all serve the same purpose. I use a generic type of stirrup which can be adapted to different size kayaks by using slip knots or wrapping excess length around the paddle shaft. Mine is made out of 15 feet of 1 inch tubular climbing webbing. I tie the ends together with a water knot. I now have a 7 foot loop which has served me well. Small pieces of garden hose are used by some to add a definite place for the foot. Some have added floats and weights so the foot loop sinks and the rest of the stirrup floats. Some stirrups have multiple steps and buckles to accommodate size differences. Some folks have made their stirrup just to fit their kayak. As an instructor I need my stirrup to be functional for all of the kayaks I come across. I have yet to find a time when my stirrup could not be quickly adapted to the situation.
I am going to show you three of the more common methods of using a stirrup for assisted recoveries. There are other methods out there and variations to the ones seen here. Feel free to adapt the techniques as your needs dictate.
As stated above, these stirrup re-entries can be used as part of many of the existing recovery methods in your bag of tricks.
The easiest and quickest assisted stirrup method has the stirrup wrapped around the coaming of the kayak that will be re-entered. The length of the loop can be adjusted by buckles and slip knots. This method is commonly referred to as a coaming loop.
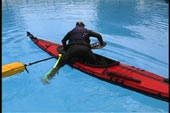
As the rescuer I stabilize the kayak (I prefer the bow to stern stabilization position) then drape the stirrup over the outside of the kayak. The paddler in the water faces their coaming and places the foot nearer their stern into the stirrup. They grab the coaming and make sure their foot and leg are underneath them. When ready, they step down and pull as needed with their hands so they can get their upper body out of the water and lie it on and towards their back deck. The foot that was closer to the bow is free to slip into the cockpit. Be sure to kick the stirrup free from your foot before placing the second leg into the cockpit. Once both legs are in rotate up and sit in your seat.
Your partner is stabilizing your kayak while you perform this maneuver. They can also help untangle the stirrup if you get fouled up in it. With practice, this can be done very quickly.
Once in and upright in your seat, remove the stirrup and put it away. Then continue with the rest of the recovery.
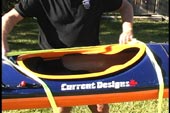
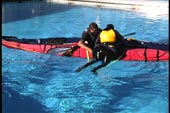
Another method I have seen is called the paddle wedge. The stirrup is looped around the paddle shaft and the paddle is submerged between the two kayaks. Once under the hulls, the paddle is turned perpendicular to the two hulls so it cannot be pulled upward.
The remaining stirrup is draped over the top deck of the empty kayak behind the coaming. Length can be adjusted with buckles and slip knots. The paddler steps ups as mentioned before.
I dislike this method because I don't like letting go of my paddle in this fashion. I also don't relish the idea of keeping my arm submerged between two kayaks while the paddle is turned during placement or retrieval. If it is a rough day I could injure my arm.
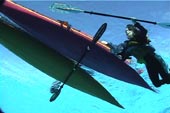
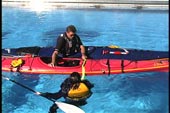
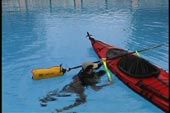
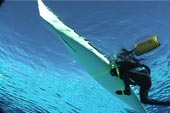
The stirrup cinch method is one commonly used for solo recoveries but can be used during assisted recoveries. The photos seen are from a solo paddle float recovery using a stirrup. We are using them because it is easier to see the stirrup without a second kayak blocking the view. The paddle and stirrup are used in the same manner but there is no need for a paddle float if you have a partner stabilizing your kayak.
The stirrup is looped on one end of the paddle. This is the end closest to the person assisting. In this picture the assisting kayak would be on the side without the paddle float. The paddle is placed on top of the rear deck behind the cockpit coaming. The stirrup goes down from the paddle, between the two kayaks, under the empty kayak and comes up the other side of the kayak to wrap over the other end of the paddle. (In this picture it finally wraps over the paddle shaft on the paddle float side) After the stirrup wraps around the paddle shaft the remainder of the stirrup hangs down in the water on the side where the paddler is in the water. As before, when you are ready use the stirrup to step up. When you step into the loop the stirrup cinches the paddle tightly to the kayak.
The length can be adjusted by putting more wraps over the paddle shaft on the side of the swimmer. As you make the last wrap slip the loop on the inside (between the stirrup and the kayak) so the stirrup doesn't slide along the shaft away from the kayak. The close the stirrup stays to the kayak the less strain there is on the paddle.
Be cautious with lightweight paddles and/or peaked deck kayaks. One could snap a paddle shaft depending upon your weight and the strength of the paddle.
If you travel with others I highly recommend you get out and practice some or all of these stirrup re-entries. It takes a number of tries to get comfortable working with the stirrup but in the event it is ever needed you will be glad you took the time to learn them.
Remember, you can buy commercially sold stirrups or you can make your own. If you carry one make sure it is accessible with the rest of your recovery equipment.
Pictures seen above were taken from the USK Video "Capsize Recoveries & Rescue Procedures"
© Copyright USK