 Find some calm flat water to begin your practice. I also recommend
being near shore in some shallow water in case your blade dives. You will
have the bottom to keep your blade from diving too far down if you make a mistake.
 Sculling
By Wayne Horodowich
If you know how to tread water you know how to scull. If you have ever played airplane with your hand outside of the car window when the car is moving down the highway, you know how to scull. If you have ever spread peanut butter, jelly or mayonnaise on bread, you know how to scull.
Sculling, when used in kayaking, is when you move your blade along the surface of the water, or in the water, with a specific angle on the blade and then reverse the angle when the blade goes in the opposite direction. Your goal is to get lift, support or pull when you scull your blade. You can have sculling braces, sculling draws, and sculling braces combined with forward or reverse strokes. The details of the specific sculling strokes will be discussed individually when I write articles about them. Regardless of the stroke, the foundation of any of the sculling strokes is of course the basic movement of sculling, which is the focus of this article.
I feel it is important to know the fine details of sculling so you will be able to incorporate this skill into other strokes. The critical point in all sculling is proper blade control. The hand closest to the working blade controls the blade. See USK article, "Blade Control".
The concept behind sculling is maintaining an angled blade as you move the blade through the water. If we pull our blade through the water with its knife edge leading, the blade will quickly slice through the water, because the knife edge provides almost no resistance to the water. If we adjust the angle of the blade to be slightly off of flat, the blade will now provide some resistance and the blade will move in the direction of the angle created. When you play airplane with your hand outside of the car, your hand flies up when you angle it up and dives down when you angle it down. The edge of your hand going into the wind is called the leading edge. The edge of the blade that is leading the movement is called the leading edge.
For the purposes of learning how to scull, it is easiest if you begin your practice with your blade on the surface of the water. This will be the same place you will do your sculling braces. When learning the sculling movement do not try to support yourself with the stroke. Your focus should be the sculling movement and developing your neuromuscular pathways so the sculling movement becomes a habit. If you try to support yourself, on the sculling blade, when you are learning the movement, there is a very good chance you will capsize if you make a mistake and dive your blade. I suggest you first master the movement before you incorporate the sculling into your strokes.
 Find some calm flat water to begin your practice. I also recommend
being near shore in some shallow water in case your blade dives. You will
have the bottom to keep your blade from diving too far down if you make a mistake.
Start with the blade flat on the surface out to your side. Begin with your strong side. For most of us, it is our right side if we are right hand dominant and the left side if we are left hand dominant. Gently move the blade along the surface with the leading edge on a slight climbing angle (the leading edge is slightly higher than the trailing edge). That means the blade will stay near or on the surface, because the leading edge is causing the blade to climb up as long as the blade is moving in that direction.
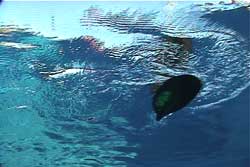 Here is the blade starting out with a slight climbing angle
on the blade. The blade is moving from the right to the left as we are looking
at the first underwater picture. From the boater's perspective, he or she is pulling the blade from
the bow toward the stern. The blade edge that is closer to the stern will be the leading edge since the blade is moving towards the stern.
As long as the blade maintains a climbing angle when it is moving (again, that means the leading edge is slightly higher than the trailing edge) the blade will move up toward the surface.
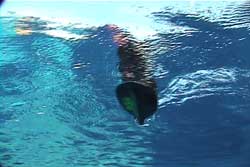 In the second underwater picture we are half way through the stroke. You can see the blade is not flat. I still have a slight climbing angle on my blade. I am still pulling the blade from my bow to my stern, because you can see the turbulence trail coming off of the trailing end of the blade.
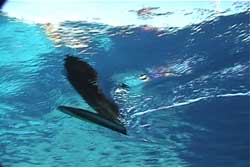 When I get to the end of my stroke there is a momentary stopping point. That stopping point is when I intend to reverse the motion of the blade. Since my blade is closer to the stern, I now need to move my blade toward the bow to continue the sculling movement. However, before I move the blade in the opposite direction I need to change the angle of my working blade. Since the blade will be moving toward the bow, the leading edge of the blade is now closer to the bow. Another way of saying it is, the new leading edge was just the trailing edge before we changed the direction of the stroke.
When you get to the end of your stroke it is important to change the blade angle BEFORE you begin pulling or pushing the blade in the opposite direction. This is the downfall (get it? downfall, ha!) of most paddlers when they are learning how to scull. They try to do it too quickly. In doing so, they move the blade in the opposite direction when the blade is not correctly positioned and the blade dives. The key is "change the blade angle before pushing or pulling the paddle."When learning how to scull your mantra should be, "correct angle, pull, stop, change angle, push, stop, change angle, pull, stop, change angle, etc...". Again, your goal is to learn the movement before you use the sculling action for bracing or draw strokes.
On the flip side, if you were to have the leading edge angled down, the blade will dive to deeper water and so will you if you are depending on that blade for support. Therefore, always maintain a climbing angle on the blade when the blade is moving in the water.
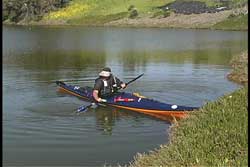
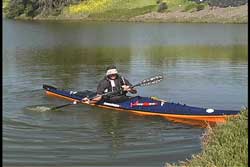 Here I am practicing in calm water near the shore. I am sculling
forward with a climbing angle on the blade. As I push the blade toward the
bow, the leading edge of the blade (the edge toward the bow since I am moving
it in that direction) will stay near the surface. The blade is actually wedging
itself toward the surface.
The control of this action is done solely by the hand that is closest to the blade in the water. If you try to control the blade with the opposite hand, you will meet with disaster or at best have poor control. The hand closest to the blade can get the best feel of the water and resistance through the paddle shaft. Learn to get paddle sensitive hands. You can feel a lot through your paddle. That is one reason I dislike wearing gloves. I wear gloves when caving for hand protection. If it is cold I prefer poggies so I can still feel the paddle shaft and the water.
I recommend you practice your sculling slowly at first just to learn the proper angle change and the movements. Then you can increase your speed to moderate. Think of sculling as icing a cake. Get used to the rhythm of the blade on the surface. This should be a smooth stroke not a big splashy one.
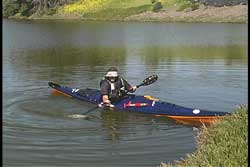 It is very common to dive your blade when you are learning how to scull. The most common mistake when learning is trying to change your blade angle and direction at the same time. If your blade is angled down when you begin moving your blade, the blade will begin to dive. That is why I emphasized the point about changing your blade angle before you change the direction of the moving blade.
Since sculling involves moving your blade in opposite directions, there needs to be a point where the blade stops. The faster you change your direction, the shorter the stopping time. The shorter the stopping time, the less time you have to change your blade angle. Changing your blade angle at the correct time is a critical part of sculling. Therefore, you need to have enough time to do so. Since sculling is used for bracing, you only get the support when the blade is moving. The longer the stop, the less support you get from your blade. When I scull, I begin changing my blade angle at the very end of the stroke. That means I am ready to move the blade in the opposite direction and my blade will have the new leading edge in a climbing angle. Earlier I mentioned the mantra you should use to learn the sculling movement. The deliberate stop and angle change should be part of your learning progression. After you get the feel of sculling, you will begin to shorten your stop time. That is when you will start changing your blade angle at the very end of your stroke.
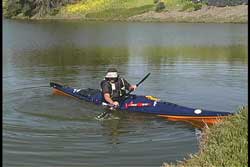 Another common pitfall for those new to sculling is having too much angle on the sculling blade. If you have too much angle, you end up slowing down your paddle movement due to too much resistance from the water. You will learn to adjust your blade angle to your needs at the time.
Everyone has their own sculling preferences with respect to the length of the sculling stroke. The shorter the stroke length, the faster you need to scull. The longer stroke lengths are slower and seem to cause less splashing. Play with the stroke length and see which one works best for you.
Remember to practice on both sides. I usually practice sculling on the surface whenever I am stopped in my kayak. I still have to remind myself to practice more on my off-side because, like many others, I like practicing what I do well. Not only do we need to practice what we do well in order to keep it well, we should be practicing more on the not-so-well side to make it stronger and more reliable.
Once you learn the sculling action on the flat surface, you can begin playing with sculling with different shaft angles. Remember to stay centered over the kayak when you try different shaft angles. Your goal is NOT to be stroking for power. Your goal is to learn how to move your blade through the water. The more control and comfort you have with blade manipulation, the more reliable your strokes and braces will be. As always, keep a relaxed grip with all of your strokes.
Pictures seen above were taken from the USK Video "ABC'S of the Surf Zone"
© Copyright USK