Carrying a Sea Kayak Alone
The best way to carry a single sea kayak is with two or more people. However, sooner or later you will end up carrying it alone. I have had my share of back strains over the years and some of them were due to lifting and lowering my kayak incorrectly. Keep in mind even if you do everything as recommended in proper lifting techniques you can still stain yourself just from the weight of the object. The technique we will discuss and any other technique you find cannot guarantee you will not get injured. As a side note, avoid carrying your kayak by the grab loops. I prefer the hands under the bow or the stern especially if some gear is in the kayak.
You may also consider one of the different kayak rolling systems on the market if you wish to further minimize your chance of strains and injuries.
Another consideration in carrying a kayak alone is the large target you provide to the wind. I have often felt like a giant weather vane as the wind gusts have blown me around. If you try to resist some of the gusts, you can easily strain yourself.
If I do have to carry my kayak alone here is the technique that has provided the most success and the greatest ease. Of course the weight of the kayak is the greatest factor to consider.
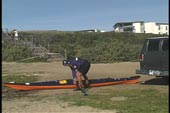
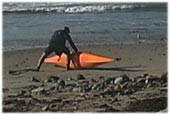
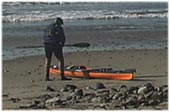
To begin I position myself next to the kayak (facing the bow) and then place my paddle shaft over my foot near the throat of the paddle. This way I can lift it up with my foot later on.
My other foot is next to the kayak. I roll the kayak on it's edge and let it lean on my leg. My goal in lifting and lowering the kayak is not to bend over at the waist while carry the weight.
While the kayak is on edge leaning against my leg I get into a squat position with knees bent and back straight. My goal is to try to create a platform for the kayak with my thigh. You must bend your knees to create this platform with your thigh.
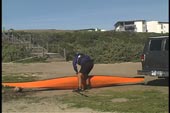
When I feel I am balanced and in proper position I slide the kayak up the side of my leg by pulling up on the cockpit coaming. As I pull the kayak passed my knee I slightly turn my knee to the outside so I can rest the kayak on the platform I created with my thigh. I usually use two hands on the coaming to pull the kayak up my leg.
Once the kayak is balanced on my thigh I position my hands for the next step. I use my hands on the coaming to roll the kayak on edge so the open cockpit is facing me. Once the kayak is on edge I can place the arm closest to the kayak inside the cockpit. I find a good location for the coaming to rest on my shoulder.
Once on my shoulder I find the balance point that will allow a comfortable carry. I prefer to carry my kayak when I am wearing my PFD because of the extra padding provided by the PFD. Sometimes I have used my sponge to add to the padding. The edge on some coamings can get pretty sharp.
Once the kayak is properly positioned you can stand up maintaining your straight back. You can retrieve your paddle by lifting your leg when you feel balanced. Remember, the paddle was resting over your foot. Point your toes to the sky when you lift your foot so the paddle doesn't slide off.
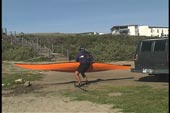
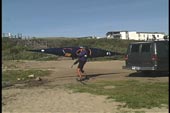
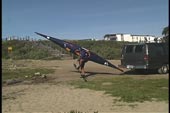
The advantage to this technique is being able to position the kayak onto your shoulder while the weight of the kayak is resting on the platform you created with your thigh.
With paddle in hand and kayak comfortably on your shoulder move your kayak to your desired location. I often straighten the arm in the cockpit to help keep the kayak from moving around on windy days.
To lower the kayak just reverse the process. Remember to lower your paddle to the ground before you lower your kayak. Squat with a straight back to create that thigh platform. Rest the kayak on your thigh while it is on edge. Once supported by your thigh take out your arm and place your hands on the coaming so the kayak doesn't get away from you.
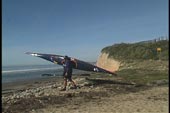
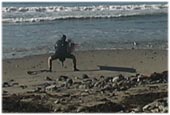
When ready, roll the kayak so it is resting flat on your thigh. Both hands will grab the coaming edge closest to you so you can perform the last step.
Before you slide the kayak down your leg slightly turn your knee inward so the kayak can more easily slide along the outside of your leg. You do not want to slide it up or down the front of the shin.
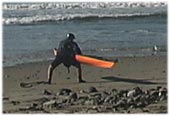
The kayak is rested on it's edge when it first touches the ground. Let the kayak roll flat onto the ground as you see fit. Remember to keep your knees bent and back as straight as you can during the lifting and lowering process.
If your kayak is full of gear I do not recommend carrying it by yourself. When I go on long trips my kayak is carried empty as close as I can get it to the launching area. Once the kayak is there then I pack it full of equipment.
If alone, I use a variety of different methods (tricks learned over the years) for getting the loaded kayak down to the surf line or waters edge. Kelp, logs, driftwood and other items have been used in my quest to save my back and the hull of my kayak from damage.
As I mentioned at the beginning, try to carry your kayak with two or more people or use rollers to avoid back strain. The new light weight materials being used in composite kayaks has certainly helped reduce the number of lifting injuries.
The golden rule in lifting is using your legs and keeping the back straight. I have had success with this technique. I hope it can work for you.
I learned this technique from a good paddling buddy of mine from Maine, Ken Fink.
Pictures seen above were taken from a future USK Video.
© Copyright USK